
The best thing about DIY decorations is the fact that you can create something different and unique for every occasion, using your favorite components that are guaranteed to please the eye.
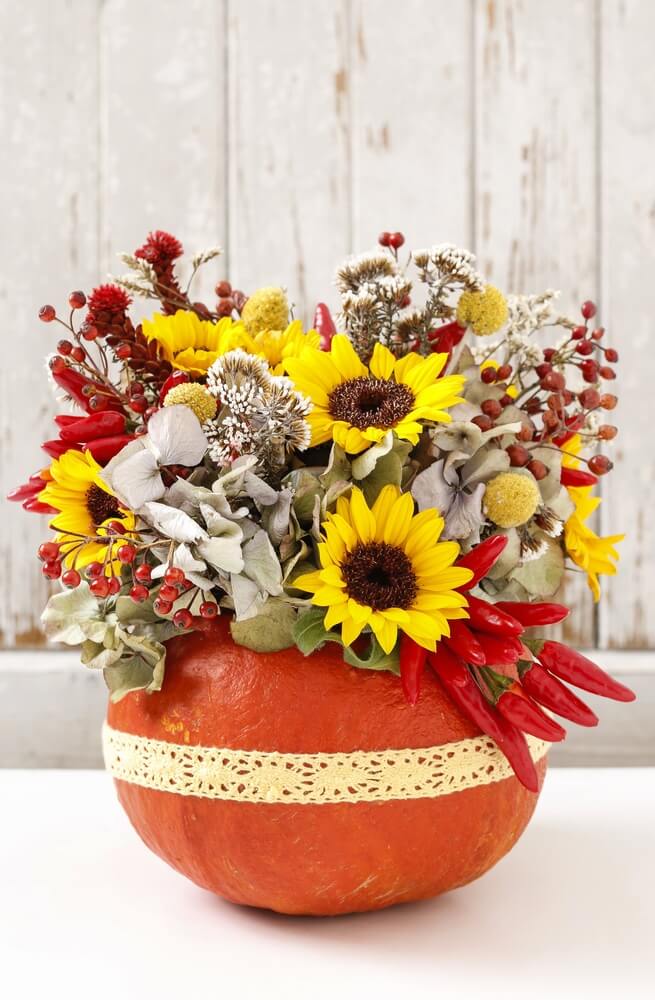
This Halloween I decided to create a pumpkin centerpiece with flowers in addition to classic pumpkins with carved-out faces. Take a peek at how you can make this fancy decoration on your own, step-by-step.
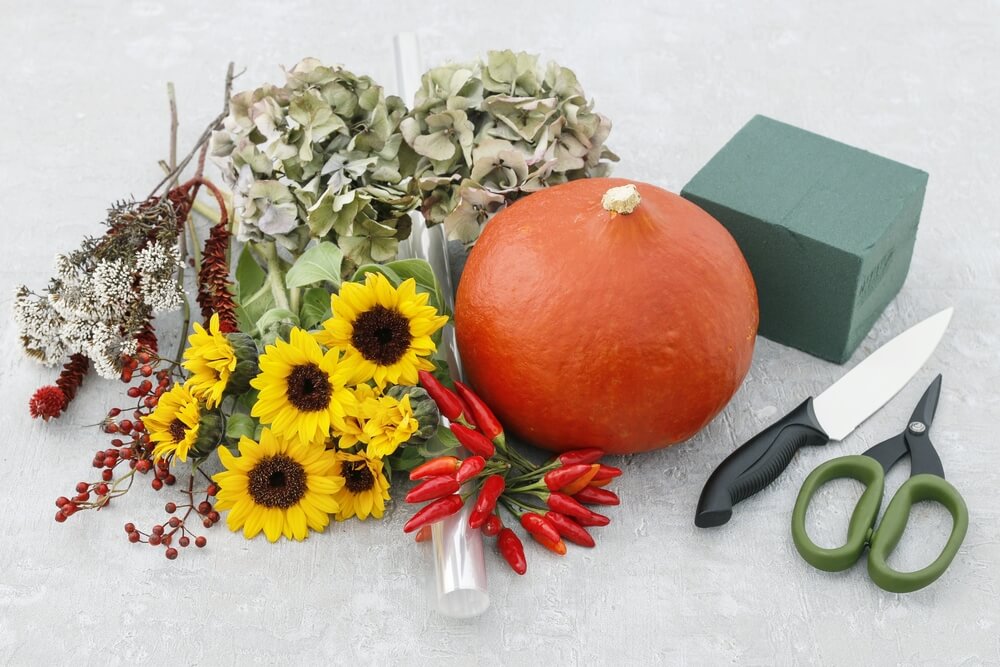
Start out by preparing everything you’ll need at a comfortable workstation. You’ll obviously need a pumpkin to form the base of your decor. In addition, you’ll need some floral foam and cellophane or a plastic bag. The rest is up to you. Feel free to choose some farm-fresh flowers, whatever is currently growing in your garden (that includes flowers, grasses and herbs) and any dried flowers you can find at home.
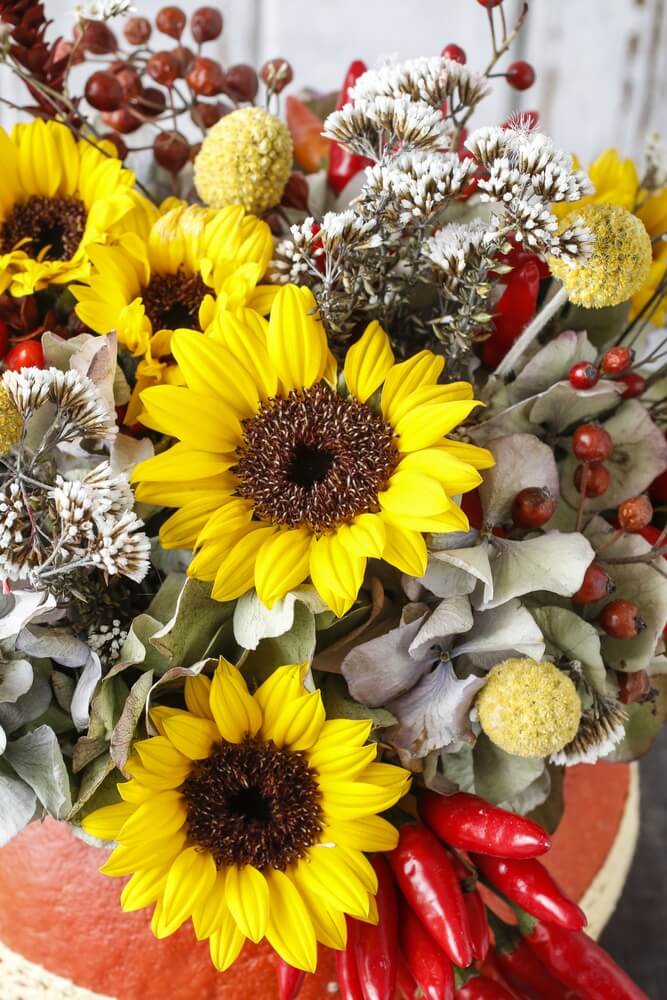
I opted for fresh sunflowers, fresh chili peppers and fresh wildflowers I picked during my weekend hike. I’m also using dried hydrangeas. Don’t be afraid to play with colors and structures here; the pumpkin will be able to hold a lot! Make sure you also have a knife, scissors and garden shears at hand.
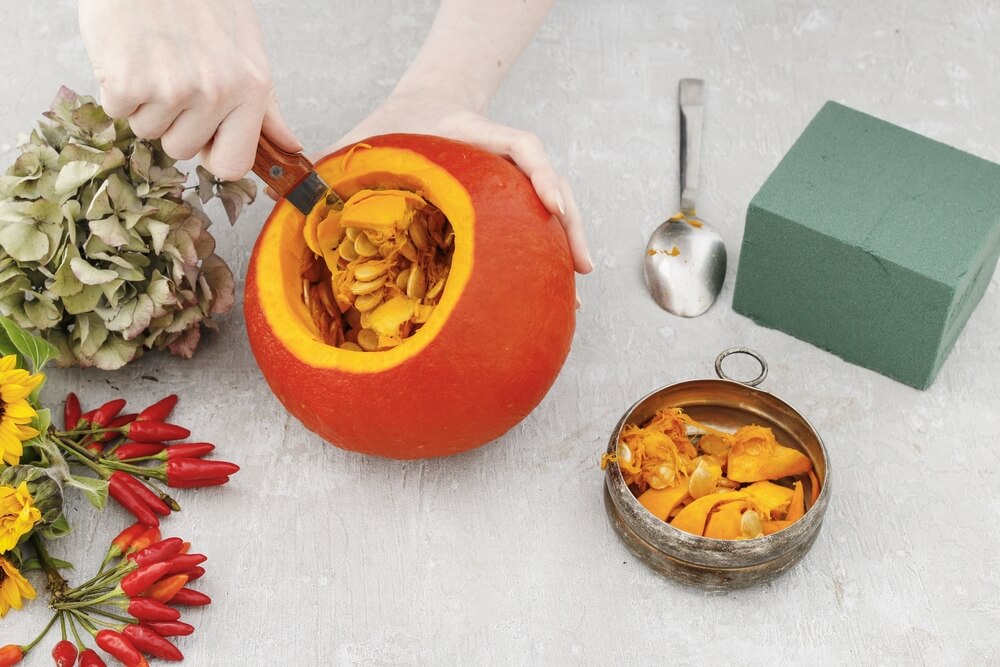
Start by cutting out the top of the pumpkin and de-seeding it.
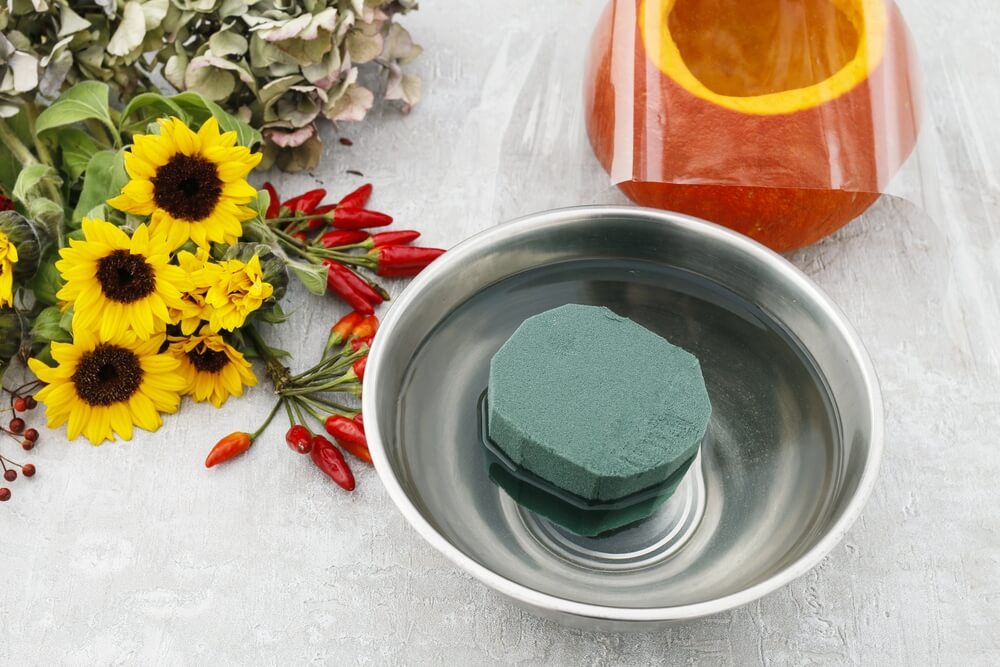
Next you want to cut out a piece of floral sponge that will fit inside the carving.
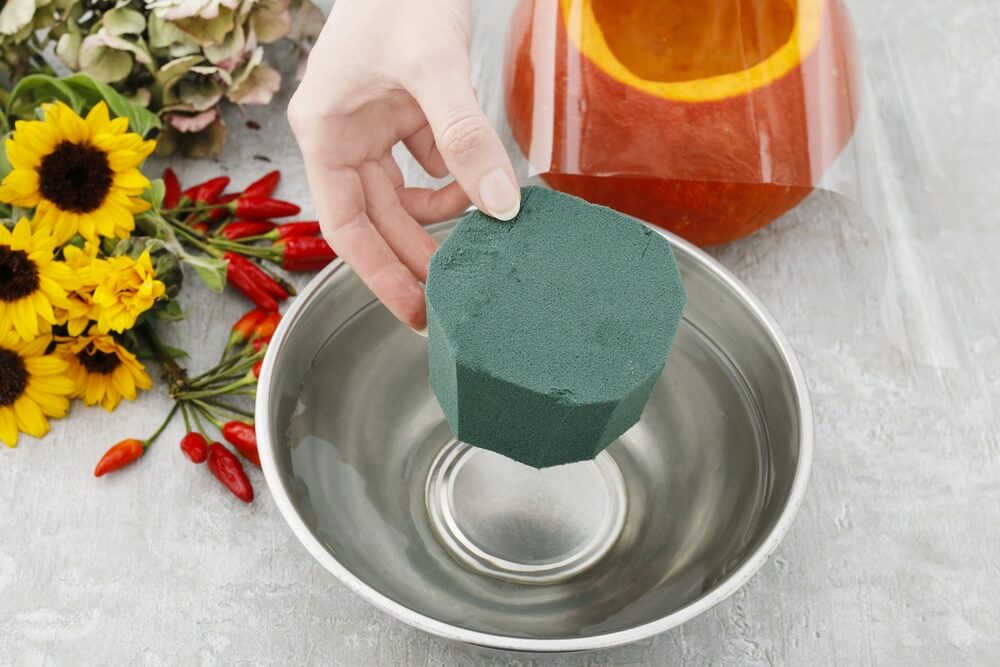
Soak it generously; the sponge will be keeping all the fresh flowers alive (let the sponge absorb the water on its own).
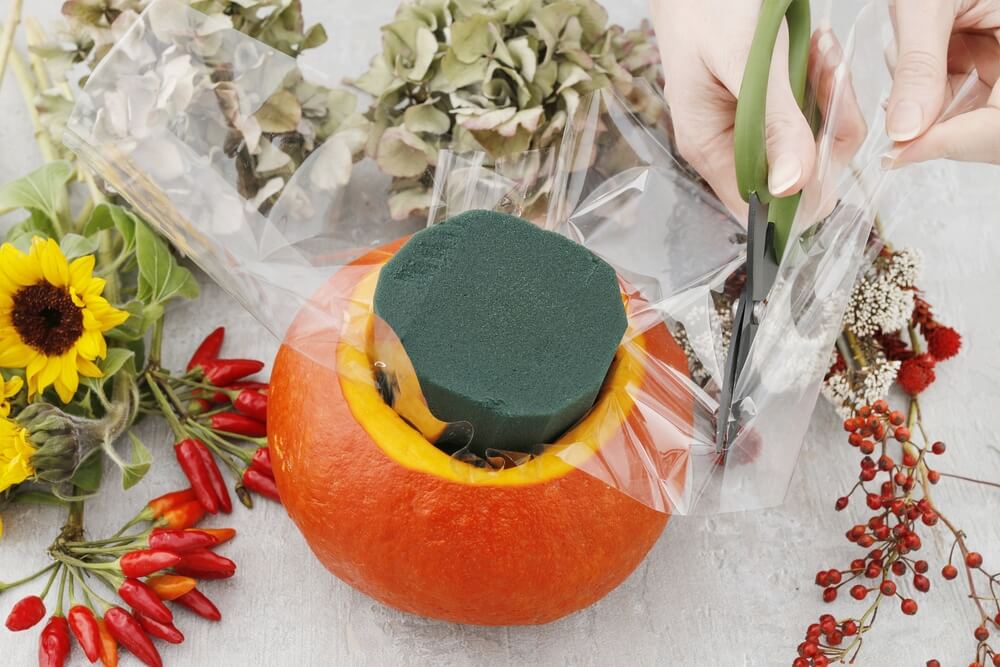
Before placing it inside the squash, wrap it in cellophane to protect the squash from absorbing the liquid.
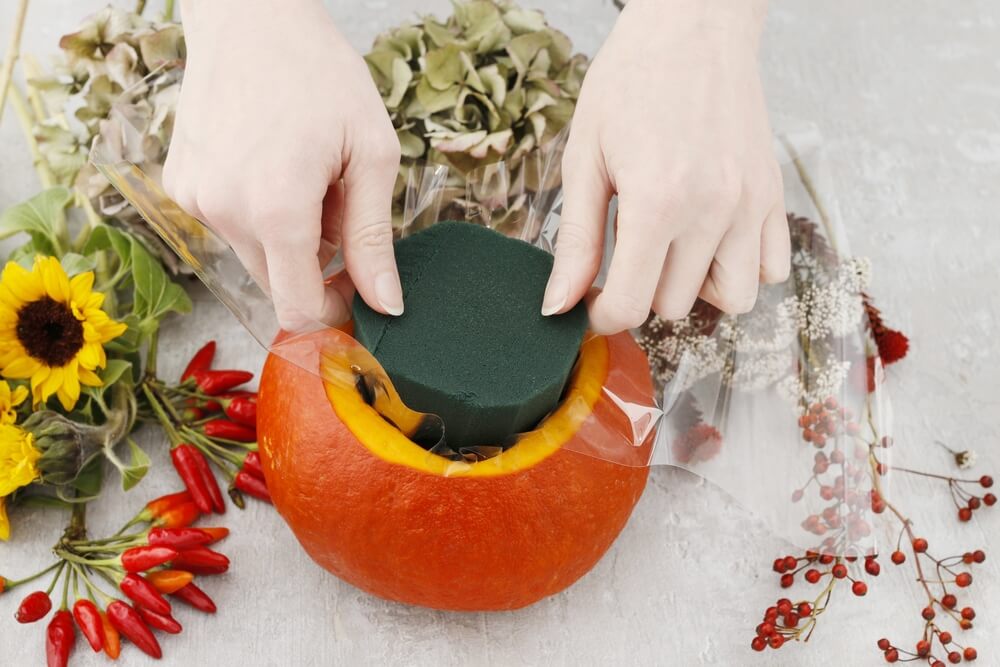
Cut out any excess cellophane so it disappears from sight.
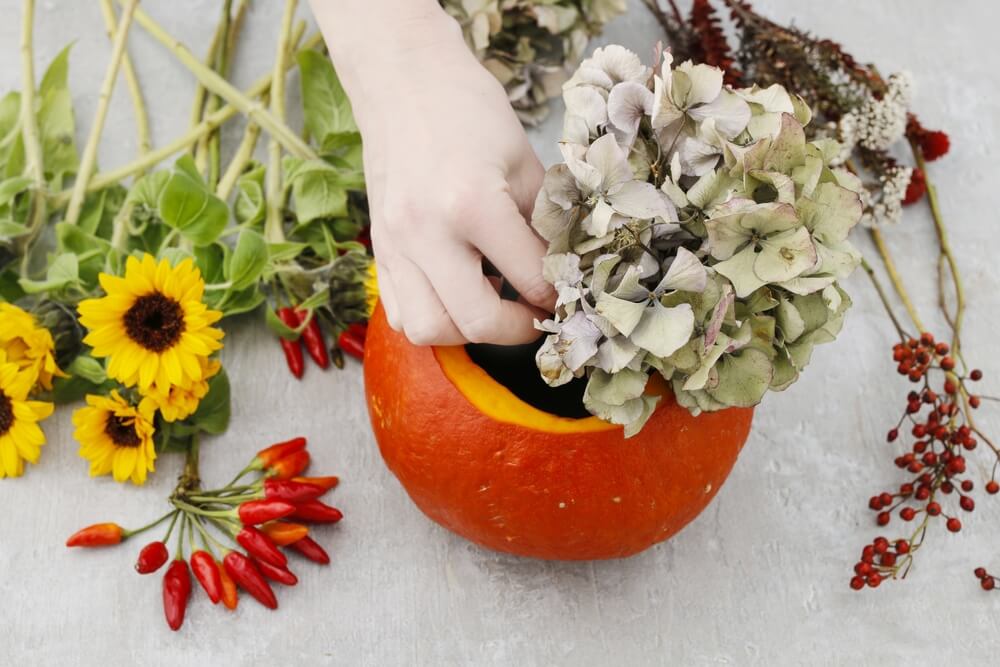
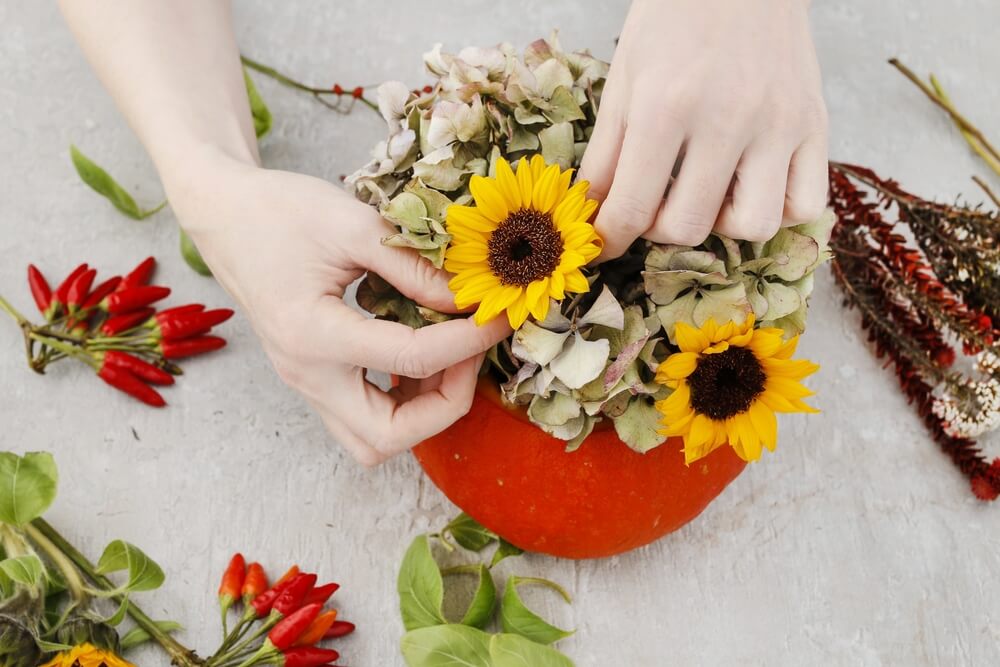
Our base is now ready and the fun part can begin: arranging the flowers in the pumpkin. Start with the largest flowers that will form the base of your bouquet and finish with the smallest ones. I’m starting with dried hydrangeas.
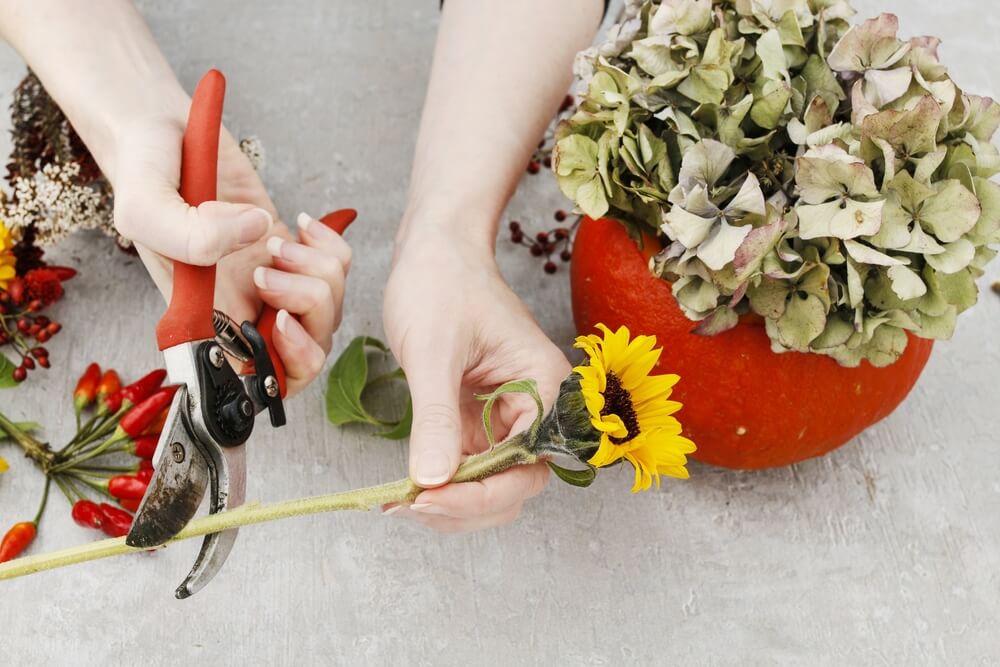
Next in line, my largest flowers are the sunflowers. Don’t forget about trimming excess stems with garden shears (we don’t recommend using scissors).
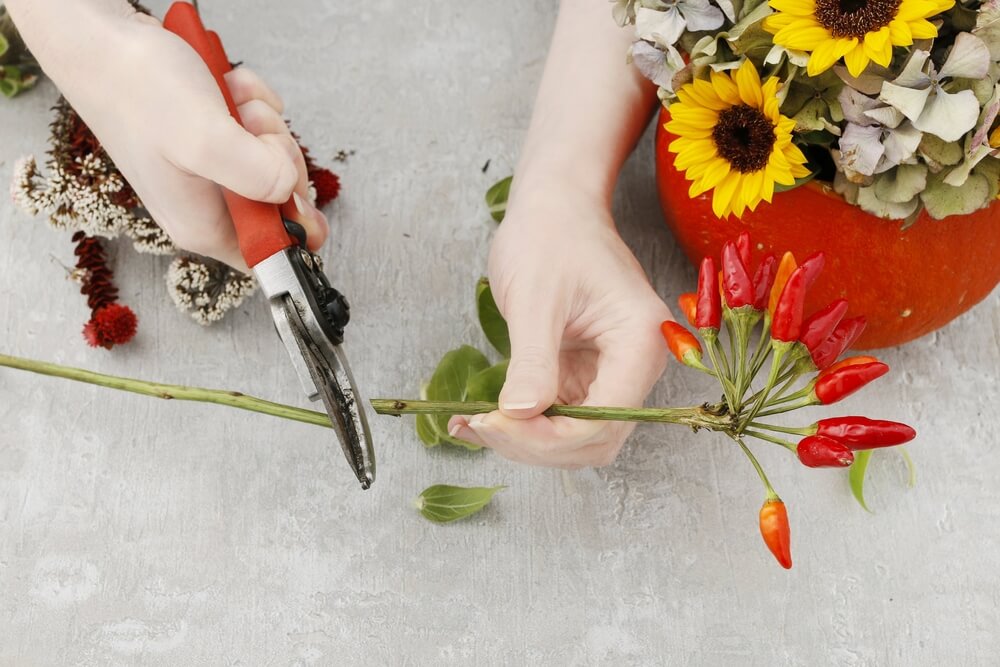
I’m finishing off the centerpiece with chili peppers and wildflowers.
Piping is the final touch that will make your pumpkin decor even more fancy. I totally love the look of this cotton piping on this autumnal arrangement.
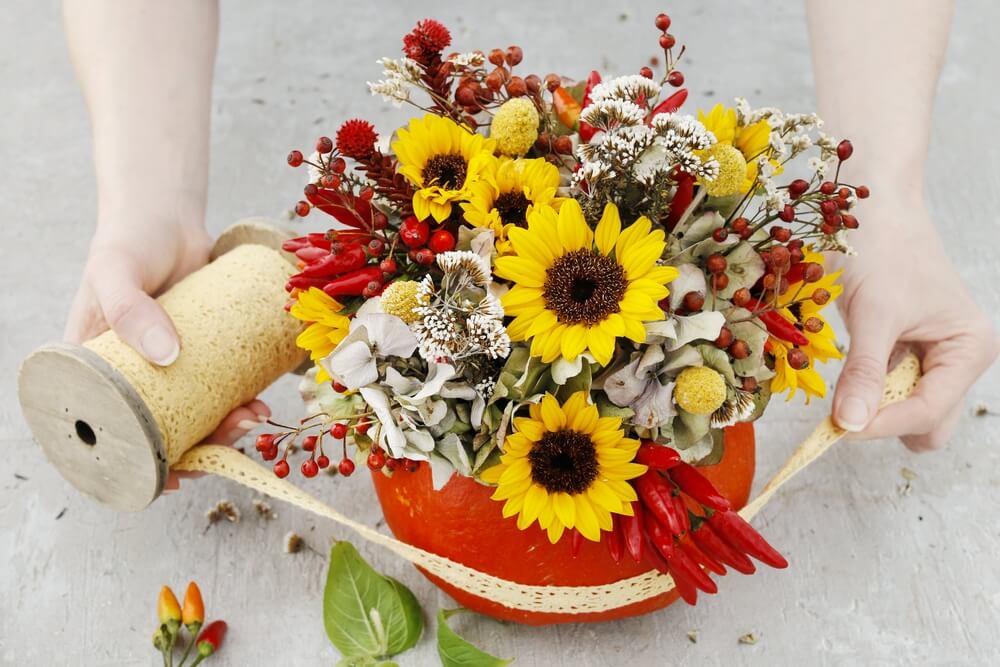
Voila! The centerpiece is ready to fancy up any room in your home.