
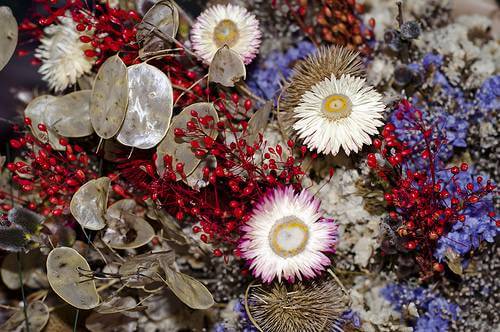
Image via Flickr by Alissa S.
Have you ever wished that you could make a precious bouquet last for years? Well, you can by learning how to dry flowers. In a previous blog, I explained how to press and dry flowers from bouquets and the garden. Today, I will write about the other methods of drying flowers. Flowers and herbs have been preserved for thousands of years. Dried herbs were buried with mummies; monks used dry flowers for decorations and dyes in hand written books; Americans in colonial times hung and dried flowers for decorative use in the home. New and advanced methods of drying flowers can preserve the color and original looks of fresh flowers.
Air-Drying
This simple method works best for certain types of flowers and has been used historically. In this method you simply cut the flowers just before they fully bloom, tie them by the stems, and hang upside down in a dry, dark location where air circulation is good. Air flow is important as you do not want them to mold before they dry. Attics are ideal. Globe amaranth, statice, cattails, celosia, baby’s breath, cockscomb, and many herbs are well suited for air drying. Blue and yellow flowers generally keep their colors well using this method. Most seed heads and some foliage respond well to this method too. You can use hangers to suspend bunches of plants from, or create a drying rack by laying flowers on a screen which has been lifted up by blocks, bricks, or books to let air flow around the flower. Roses and fuller flowers can be dried on a drying rack but remember reds will turn to an almost black color. Spray lacquers, even hairspray, are good additional method after drying for preserving seed heads, cattails, fruits, and cones. Many beautiful dried flower arrangements are possible from this easy drying method.
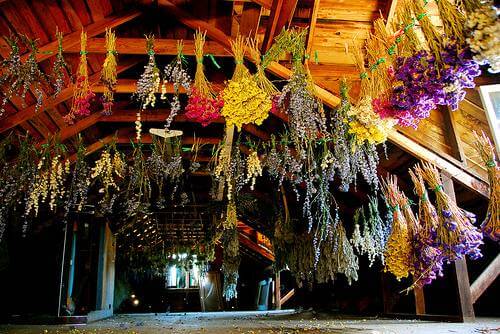
Image via Flickr by Don Hankins
Silica Gel
I have very successfully used silica sand, also known as silica gel, to dry flowers. Silica sand is available at craft stores and located in the floral section. To use this method, you cut the flower stem short (to about a half inch) and then loosely pack the flower in the silica sand. Choose airtight containers that will hold your flowers without crowding them. I use holiday tins. Pour an inch or so of desiccant in the container then a layer of flowers. Make sure they are in the shape you want them because this is how they will dry. Cover the flowers with desiccant, and then repeat making a flower /desiccant lasagna. When flowers are crisp and dry they are finished. Different flowers have different drying times, but some guides are given online. Some flowers, such as roses should be wired before drying in silica. The wire can be bent to fit into the container.
The silica gel and flowers should be left in an airtight container for about a week; follow the directions on the silica gel package. Times vary by flower. This method is great for multi-petaled flowers like roses and zinnias. Flowers retain their original form unlike with pressing, although the colors may change. When the silica gel is dry it is blue; when it absorbs moisture from the flowers, it turns to pink or gray. Silica sand can be re-used for a long time by baking it in the oven at 250 degrees for several hours between uses. When it turns to blue again, it is finished baking. Store it in an air tight container.
Other Desiccants
Other desiccants used are sand, borax and white cornmeal mixtures, and cat litter. Sand is one of the oldest desiccants known to man, but it takes longer than other methods. It also must be washed and dried and can’t contain salt. Borax is too strong to use alone as it will burn flowers, but mixed with corn meal it works well. One part borax to one part cornmeal is recommended for rapid drying. The borax/cornmeal mix, like silica gel, can be reused by baking in the oven to remove moisture. Although sand, borax/cornmeal mix, and cat litter are cheaper than silica gel, silica gel in the opinion of most, is the fastest method and the best method for drying flowers to retain their color. Clay, cat litter, perlite, sawdust, and cornstarch have also been used to create flowers that are later used in dried flower arrangements.
Microwave Drying
Flowers with thick petals do not respond well to the microwave method, but flowers with many petals like roses and zinnias do. Choose flowers that are not fully opened. You will follow the directions for silica gel above with the additional step of microwaving. Silica gel works best although you can use a borax/cornstarch combination or cat litter. Put the silica sand and flowers in a microwave safe container and microwave, generally for two minutes or so-a link below gives drying times for microwaving. It is best to use a microwave thermometer to see when the flower reaches 170 degrees then it is done-different flowers have different microwave times. When finished, crack the lid and let them sit for 24 hours. Gerbera daisies, astilbe, mums, hydrangeas, daffodils, roses, tulips, delphinium, and pansy are just some of the flowers that dry well in the microwave/desiccant method. Remember, don’t put wire or metal in the microwave!
Dried wreaths, dry flower arrangements, wall hangings, framed art, shadow boxes, and potpourri are just a few things you can make if you learn how to dry flowers. Memories of bouquets and gardens can last a lifetime with just a little effort. I think that creating dry flower arrangements is a fun and rewarding hobby. I hope you do too!
Drying and Preserving Plant Materials
Drying and Preserving Flowers and Plant Materials for Decorative Use