
Have you ever seen a flower so beautiful that you couldn’t bear to see it die? Make the beauty of flowers last with flower photography. One summer, I actually received a bouquet of sunflowers and roses instead of making one for someone else. It was stunning, and I was so happy that I thought to photograph it; just looking at the pictures of it still brings a smile to my face and evokes fond memories of the happiness I felt when receiving it. I encourage you to try your hand at flower photography – you will be able to enjoy your flowers at any time of year this way, and you may even find a new hobby! Here are a few simple flower photography tips for the novice flower photographer.
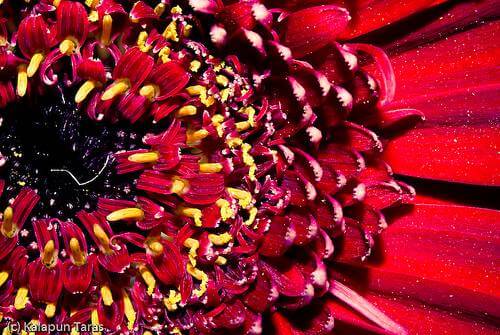
Image via Flickr by Taras Kalapun
Of course we are talking about flower photography here, but choose if you are taking a picture of a part of a flower, a single flower, a garden of flowers, or a whole field of them. For a close-up of a flower or flower parts, you will want to use the macro mode. Digital cameras or camera phones usually have this setting, and you just need to select it. Traditional cameras may need a special lens. Use the LCD viewing screen to capture the desired image. Decide what part of the flower you want to focus on – when you see the image you want, press the button. The macro setting works well for single flower heads as well. Consider including an insect in the photo – this adds interest.
When taking pictures of flower beds or gardens, look for something else to serve as a focal point, such as a mountain, building, or person, and use the flowers as an accessory when shooting from far away. Again, this makes the picture more interesting. A field or bed of flowers alone may look pretty but makes for a boring picture. Don’t add too much, though, or your photo will look as if you put no consideration into what you were taking pictures of.
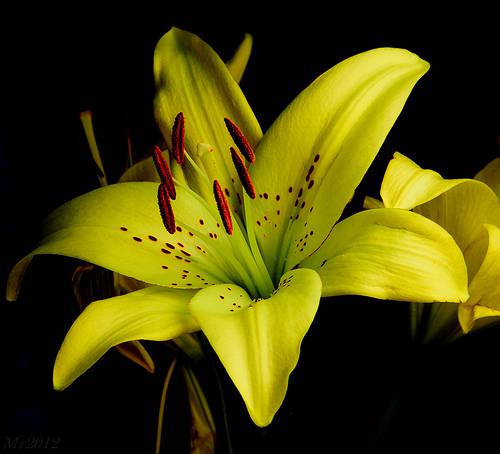
Image via Flickr by Flower’s.Lover
Eliminate Unwanted Movement
One of the easiest photography tips to implement is using a tripod. A tripod eliminates shaking hands and helps you take a better photo. If the wind is blowing your subject around, be patient – if it is an especially windy day, consider taking your subject indoors if possible. For example, you may want to cut a flower and put it in a vase indoors. You can place a solid-colored background such as black cardboard behind it, and it will look great. An added bonus of bringing flowers indoors is you don’t have to struggle with uncomfortable positions in the garden! If bringing the subject inside is not an option, you can try to make a shelter around the flower to protect it from the wind, but don’t let it show up in the picture. Or try tying the stem of the flower to a stationary object nearby or to a garden stake. If these options don’t work, you may need to wait for a calmer day.
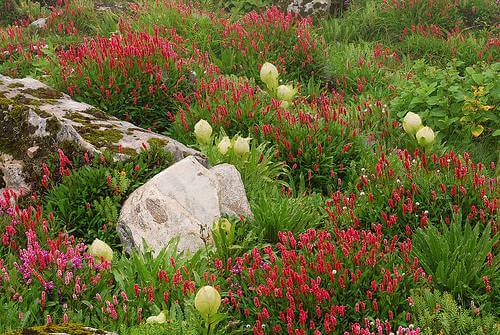
Image via Flickr by Alosh Bennett
Experiment with Different Angles
Try viewing the subject from different angles. Get down on your knees, at eye level with the flower. Lie down and look at it. View it from an angle instead of just from the front and back, and view it at different heights. Pay attention to how the light plays on the subject at different positions. Don’t be lazy, and don’t be afraid to experiment. Make sure that you do not accidentally include something unwanted in the photo, like your fingers or feet!
The best times to take pictures outdoors are before 10 a.m. and after 4 p.m., when the sun is lower in the sky and not as powerful; this makes colors appear brighter. Cloudy days are great for taking close-up pictures. Experiment with backlighting for single flowers or vases of flowers – light shining through flowers makes them appear to glow. Use a gray card or take an incident reading to determine the correct exposure if using a traditional, non-digital camera. Modern digital cameras have built-in incident meters and gray balancing so you do not have to worry about this. Consider the direction of the light – walk around the flower and observe how the light makes it look from different positions.
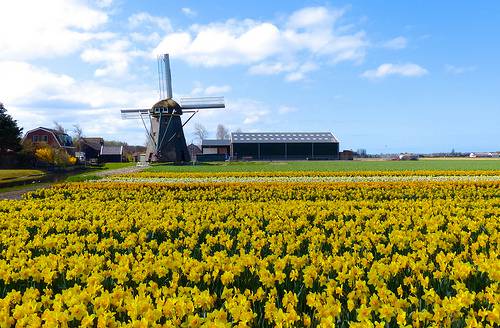
Image via Flickr by Roman Boed
I hope you find these photography tips useful. As with any hobby, practice makes perfect!